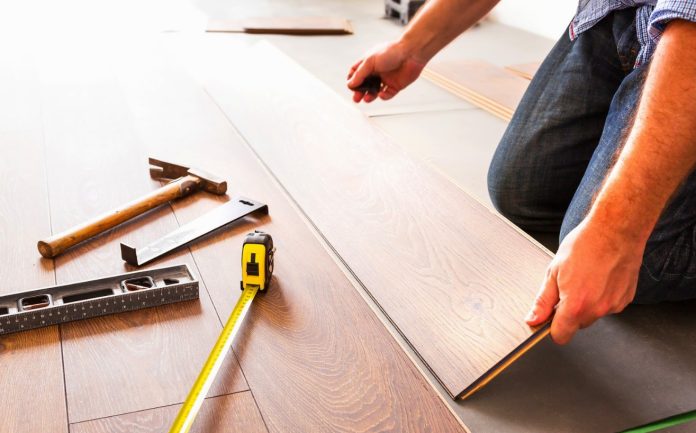
Timber flooring is a popular choice for homeowners and decorators alike. It’s warm, beautiful, and adds a touch of elegance to any room. However, timber floor installation requires skill, experience, and patience. It can be a complicated process with many different factors to consider, including the quality of the materials, the intensity of the labor, and the style of the finished product. The good news is, with the right preparation and a few expert tips, anyone can successfully install a timber floor without any hassle.
In this blog post, we’ll share some essential tips that will help you achieve a successful timber floor installation project. We’ll cover everything from preparing your subfloor to selecting the right timber and determining what type of finish you should use. We’ll also provide guidance on the tools you’ll need for the job, as well as tips for ensuring a smooth and level install.
1. Prepare the timber flooring with sanding and staining
One of the most critical steps in successfully installing timber flooring is to prepare the surface correctly. Sanding and staining are crucial to ensure the flooring is smooth, free of any imperfections, and is ready to receive the new finish. Sanding involves removing the surface layer of the timber, including scratches, dents, and other blemishes which may have accumulated over time. Once the floor is sanded, it is time to apply an appropriate stain to achieve the desired color and finish. It is essential to select a quality stain that best suits the timber and the desired final look and to apply the stain evenly for the best result. Proper sanding and staining can make a significant difference to the final installation and can guarantee that your timber floor will look beautiful and last for years to come.
2. Assemble and fasten the flooring pieces together
Once you have prepared the subfloor, it’s time to assemble and fasten the flooring pieces together. Start by selecting the appropriate timber flooring pieces and arranging them in the desired pattern. Remember to leave a gap between the wall and the first row of flooring, as this will allow for natural expansion and contraction of the timber. It’s also important to stagger the end joints between rows to create a seamless and stable flooring surface. To fasten the flooring pieces together, use a flooring nailer or stapler, as well as adhesive, to secure the joints and prevent any movement or squeaks. Be sure to follow the manufacturer’s instructions for using the nailer or stapler and dispose of any waste material properly.
3. Check for moisture before installation
Before installation, it is essential to check for moisture levels in the subfloor and surrounding area. Moisture can negatively impact the performance of your timber floor, causing it to warp, cup, or buckle over time. You can use a moisture meter to check the moisture levels, and if the readings exceed the manufacturer’s recommended limit, take appropriate measures to rectify the problem. Additionally, monitor the moisture levels of the subfloor and surrounding areas even after installation, especially in areas with high humidity or moisture, such as basements, bathrooms, or kitchens. Continued monitoring will ensure the longevity and stability of your timber floor.
4. Use the appropriate adhesive for installation
Using the appropriate adhesive for timber floor installation is crucial to a successful installation process. There are different types of adhesives designed for various purposes, and not all of them will work well in all scenarios. Before installing your timber floor, you must identify the adhesive that will provide the most effective and long-lasting bond between the floorboards and the subfloor. Factors to consider when selecting the appropriate adhesive include the type of timber floor, the subfloor material, and the estimated foot traffic. Moreover, it is essential to ensure that the adhesive is suitable for the specific climatic conditions of the installation environment to prevent any adverse effects on your floorboards in the future. Failure to use the right adhesive can result in your timber floorboards becoming loose or shifting over time, causing potential hazards and ruining the aesthetic value of your installation. It is advisable to consult with a flooring specialist or adhesive supplier to determine the most appropriate adhesive for your particular installation.
5. Inspect the installation for any flaws or blemishes
Inspecting the installation is a crucial step in ensuring the success of your timber floor installation project. After all the hard work and careful planning, it is important to thoroughly evaluate the installation for any flaws or blemishes. This step should be done before any final finishing or polishing is performed. Inspect the floor closely for any signs of unevenness, gaps, warping, or any other anomalies that may affect its durability or appearance. Any issues found should be addressed immediately to avoid further complications down the line. Always keep in mind that a well-inspected and polished timber floor can add an elegant touch to any space while also increasing its value.
To wrap up, timber floor installation can be a complex process, but with the right tools and knowledge, it can be a successful project. These expert tips can help ensure that the installation process goes smoothly and that your timber floor lasts for years to come. Remember to take your time, be patient, and follow best practices to achieve a beautiful and durable timber floor that adds value to your property.


